Another year, another school production! This time they needed a lot of costumes. Luckily there was help from another talented mum and plently of time to make everything.
After a couple of meetings we agreed my ‘pile’ of costumes would be the Queen, King, Knave, Duchess, White Rabbit, Mary, Lory, Dodo, and Dormouse. Alice was being purchased on-line and all the other costumes were being made by the other mum…totally manageable.
A quick apology – I know blogs shouldn’t go on forever but there’s going to be a lot to get through here! (A cuppa might help! I’m on my second already!)
Getting Started…
As usual we only had a small budget for fabric so the first stop was to go through the cupboards and see what was there – and starting to google (of course) because I wasn’t actually that familiar with some of the characters. I found some great curtain fabric pieces which started to inspire me for the Duchess, loved the idea of using reclaimed fabric too, and a grey jacket which I could adapt for the Dodo. The royal family, rabbit and dormouse would need purchased fabric and the Dodo and Lory needed tulle to create a bird effect.
I should mention the school was actually in Prague, Czechia, where we lived for 8 years. The significance of that was I hadn’t found very many fabric stores there but there was one I knew of (Flex-Tex in Prague 8) which had a lot of fabric to choose from and some on offer. So I headed up there to look for bargains!
The Designs
How did I come up with the designs? Thats not easy to answer because it was quite a fluid process based on what I could manage to sew and the fabric I could find, but for the Queen I was offered a costume pattern which was actually a top, skirt and underskirt which was a great start. I decided to make the Queen in red, with black underskirt and under-sleeves, based on similar costumes I had found on-line, with white accents. That left me with finding ways to use the same material for the King and Knave to compliment the Queen. For both male performers we agreed they should wear black long sleeve shirts, trousers and shoes underneath – a bit less pressure for me and to be honest I think the boys felt more comfortable wearing some of their own things.
Fabric Choices
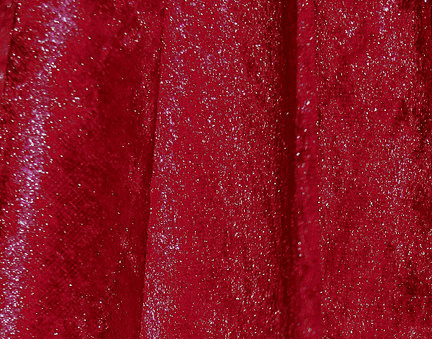
OK – so here’s a lesson learnt … think long and hard about using (cheap) polyester jersey velour if you have 1. a black dog, 2. that wooden block flooring and 3. an old, not very powerful hoover… The dog literally glowed shiny red for about a month and I don’t think I’ll ever really clean the bits out from between the floorboards. It was also that point at which we were starting to hear about fibre pollution the waterways … I will avoid this fabric in the future! It was also quite difficult to sew and I’ve learnt so much from that project about using the correct needles for jersey fabric, ballpoint, both for your sewing machine and your overlocker because they don’t split the fibres.
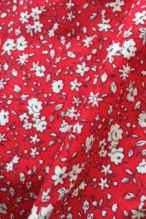
For Mary’s dress, which would be the same design as Alice but in a different colour I found some pretty pink polyester cotton fabric with a tiny flower design. In comparison to the jersey polyester it was a dream to work with. Mary would also have a headband to match the dress and a white pinafore which we found in the drama store which just needed mending, washing and a press.
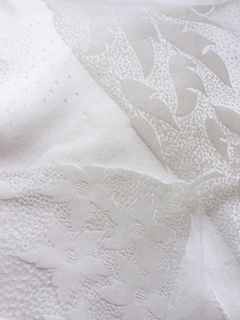
The costume design for the White Rabbit meant that I only had to make a waistcoat. There was a piece of light cream polyester taffeta with a damask design which was on offer at the shop and I decided a cream waistcoat would look smart over the white shirt and breeches which we already had.
A Lory is a highly coloured member of the parrot family so I chose tulle in red, blue, green and turquoise and for Dodo I needed white to give a ‘bird effect’ to the costume. When I googled a dormouse it was clear we were going to struggle to create a similar fur effect so we had another look in the drama store and found a piece of grey fur fabric which we could use for free … decision made.
Making it All
You’ll be relieved to read I’m not going to go through everything in detail – but here are a few highlights with photos to show you how it all worked out.
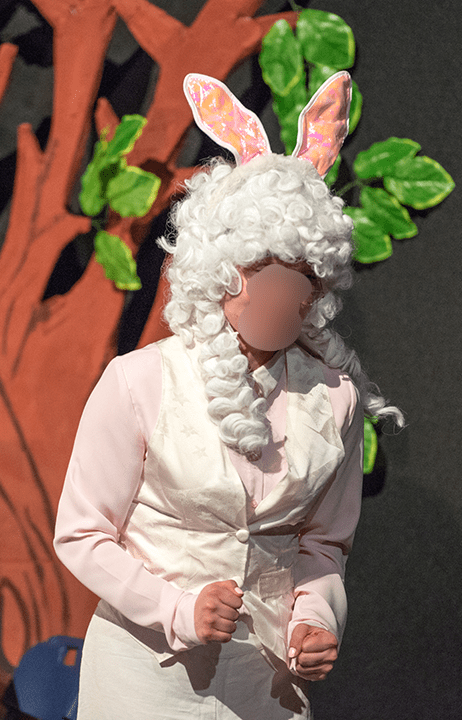
The White Rabbit waistcoat, complete with fob watch, worked perfectly. I googled to find out about how to create a bodice block and then drafted a pattern from that. I found a pale pink shirt in a sale instead of the white shirt we had originally considered and that worked really well with the ears on top of all that crazy hair.
The Lory was more difficult than I expected. I had never worked with tulle before and it really didn’t do what I wanted! It curled up, stuck together and generally caused me quite a bit of frustration. Even with the on-line ‘hints’ about spraying it with diluted fabric softener! We found the rainbow coloured wings and headdress in the school drama store – no idea what they had been used for but that totally transformed the costume. The Dodo was a more serious bird and I decided to keep it to ‘Dodo’ colours (although as they’re extinct I didn’t have to be too careful!) Adding the white tulle to the jacket sleeves and a tail at the back was enough to give the impression of it being a bird. I bought a ‘mad professor’ wig to give the classic bald headed look, and then tried to make a Dodo ‘beak’ which I sewed on the forehead. The idea was great, but in practice…oh dear…it really looked rather awful! Well that didn’t last into the performances but I have a photo of it for your amusement … but with the grey leggings and long bright yellow socks the costume came out fine.
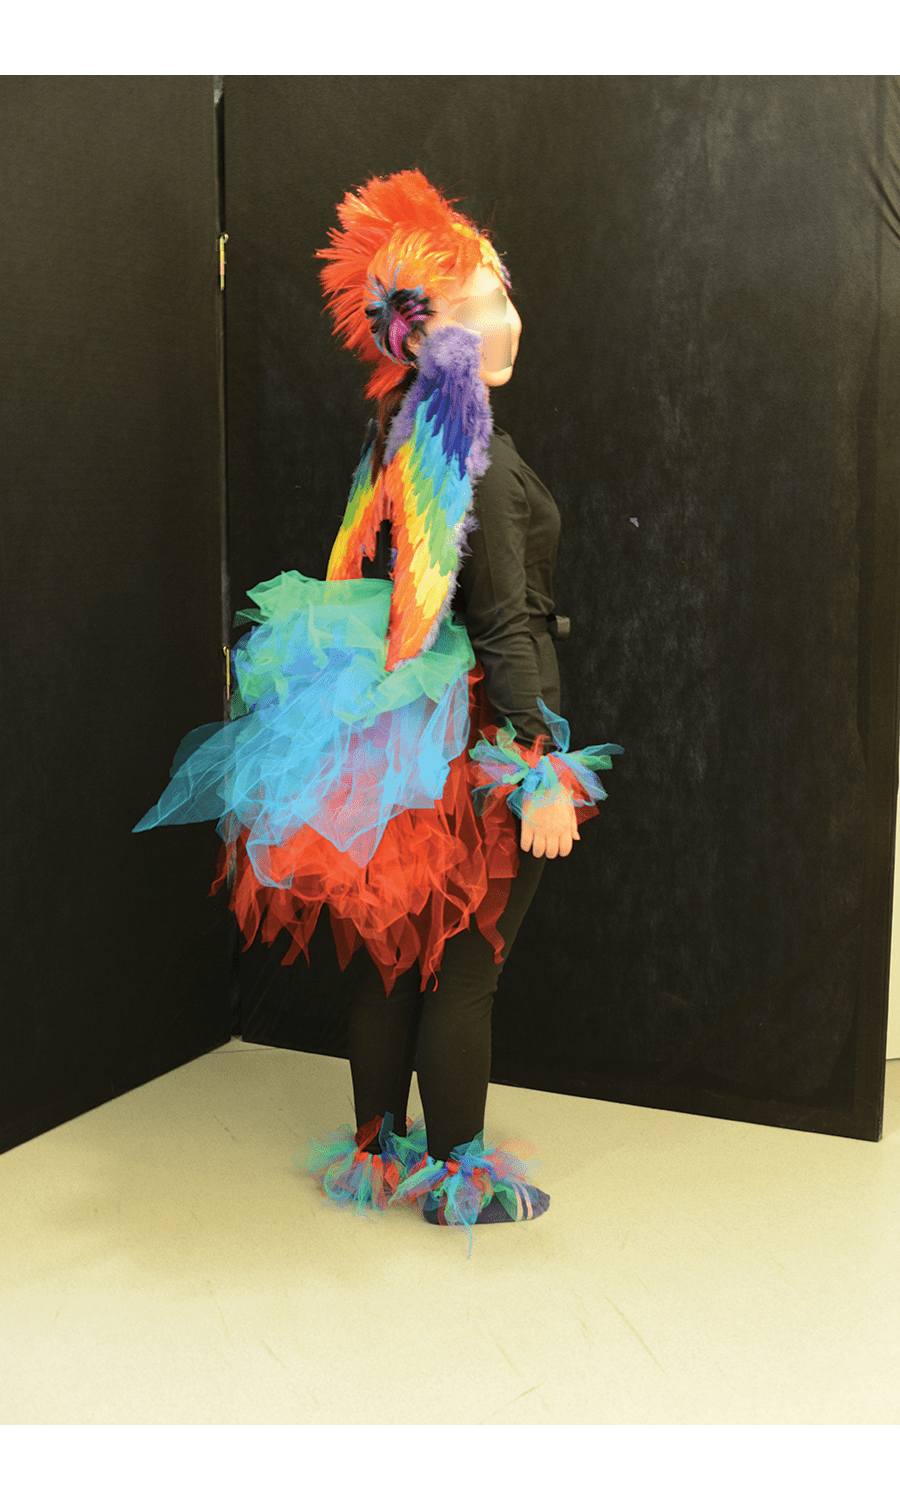
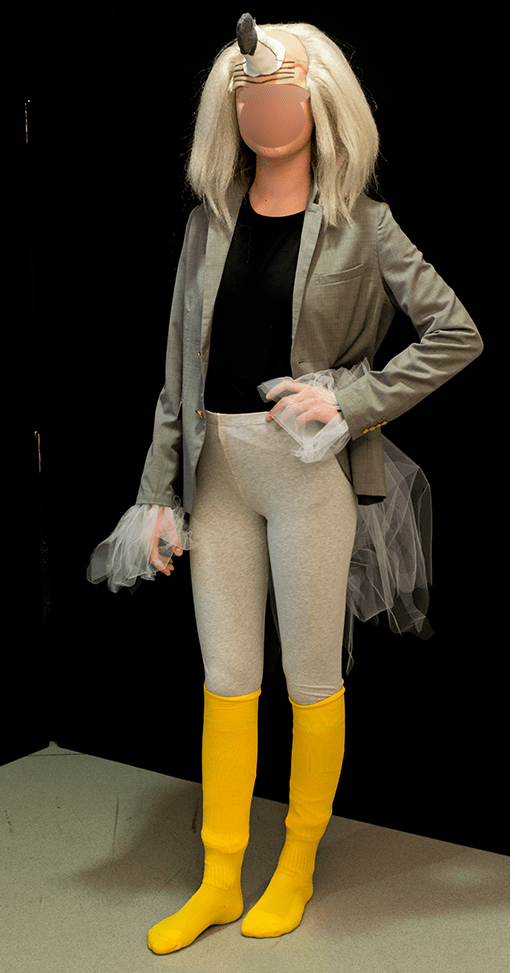
Dormouse was a very simple creation with the grey ‘fur’ – I made a long-sleeved t-shirt with a tail, some matching leggings and pink socks – which only just lasted the performances on the grubby floor. I bought a head band which started out as shiny pink stars, took it apart and turned it into some little ears.
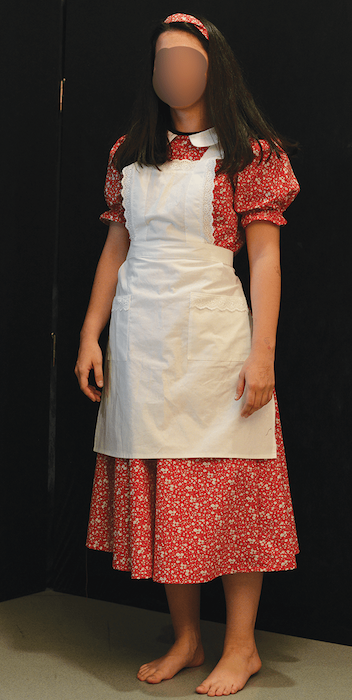
Mary was a simple girls gathered waist dress with puff sleeves and a white collar in the pink fabric with the ‘found’ petticoat on top. The student was so happy wth her dress it was a pleasure to make it for her! I made it a little on the large side with poppers at the back because she had the quickest change of everyone in the cast as she was also cast as one of the ensemble birds.
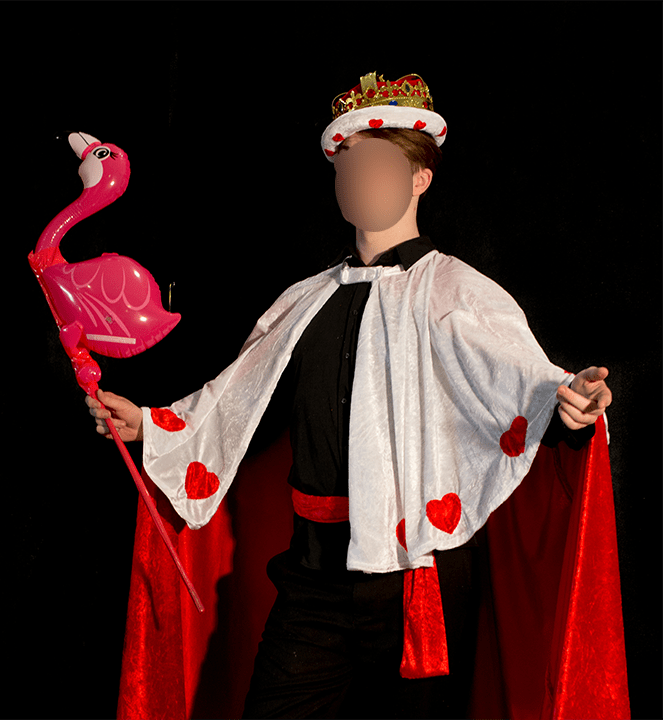
I mentioned before the King and Knave would be wearing their own tops and trousers so all I had to make was a long cape and crown for the King and a tabard and short cape for the Knave. I used the red material I had purchased as the main colour and then the same in white to make an ‘ermine’ layer for the King then decorated it with hearts from the red fabric. As I had a lot of fabric I also made a cummerbund to tie around his waist. The crown was a cheap gold crown purchased from a local dress up store but I added the white ‘ermine band’ and small red hearts.
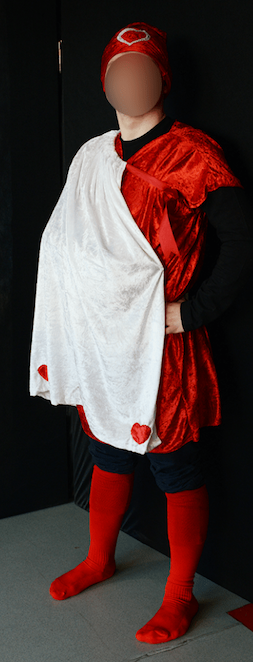
For the Knave the tabard and short cape was super quick and simple and I decided to make him a ‘hat’. I found a picture on-line of a costume with a slouch ‘beanie’ hat which I liked so I copied that with the heart motif as decoration. Voila!
The last three Costumes!
If you’ve been keeping a check since the beginning of this blog, you’ll know there are only two more costumes to describe… but yes, you guessed it, there was one more to add right at the end… anyway we’ll come to that in a minute.
The Queen was an amazing ‘project’. I had only made a few long dresses before – so this was going to be quite a challenge. Luckily I had the ‘elizabethan style’pattern for underskirt, overskirt and top so I got to work. (By now, of course, the dog was already glowing like the Hound of the Baskervilles from the fibres!)
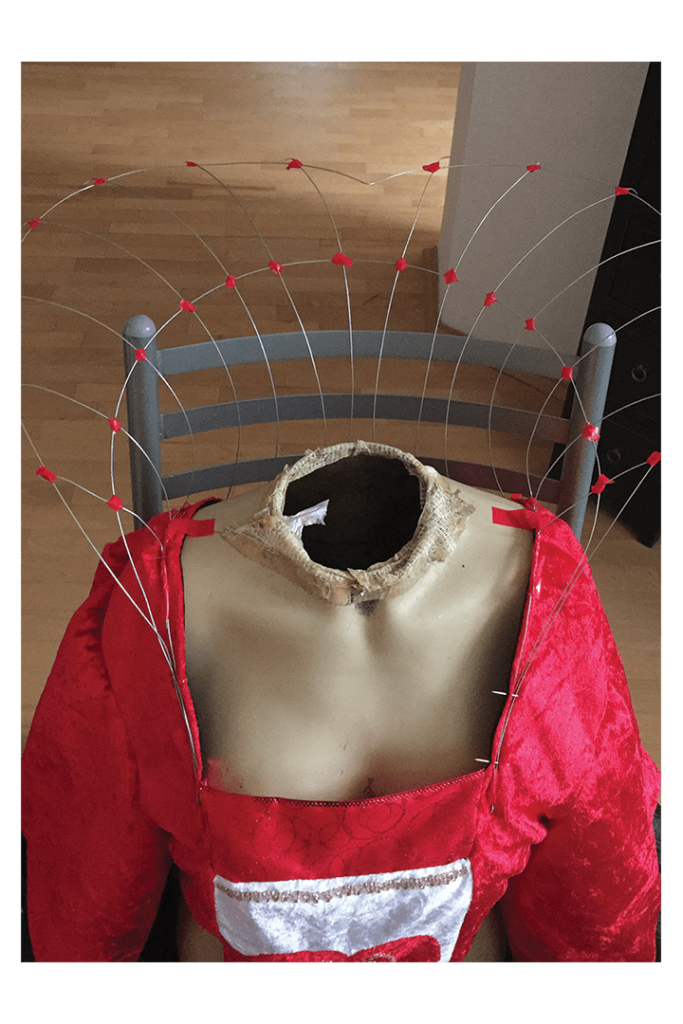
The pattern made all the difference. I had to adapt it of course but I was delighted with the effect, especially after I beaded the hearts on the front which really picked-up in the lights. Having seen other Queen costumes on-line, I was keen to make the collar so I googled some ideas of how to make the frame and bought some wire from the local DIY store. With a borrowed body shape from school I started to follow the instructions and build the frame. In the photo below you can see it held together with electrical tape before I bound each junction with thread and then covered it with a finer red fabric (the velour would have been too heavy). The frame was stitched onto the front of the dress to hold it in place. In it’s uncovered state it looked amazing but as soon as I added the fabric it struggled to hold its shape. With hindsight it was also too heavy for the front of the dress and tended to fall backwards as she danced and sang. Maybe I should have found a way to fix it down the back of the dress as well, but we managed to keep it in place for the performances and everyone was happy.
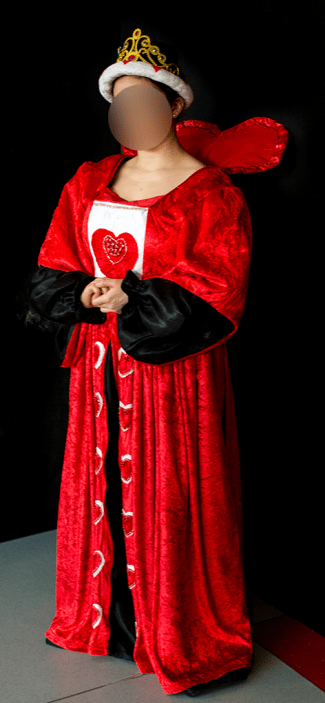
This photo was taken at the dress rehearsal and the dress was hanging down and needed to look fuller so I added a petticoat which made a big difference. You can see how the collar frame was pulling backwards.
The last main costume I made was the Duchess. The green fabric was all reclaimed from the drama store and was originally old pieces of curtain. I made the skirt all in one piece – the black front was taken from one of the Nunsense costumes from the year before which I ‘re-used’. To make her look more ridiculous I made a simple crinoline frame for under the skirt with some plastic curtain tracking from the DIY store and fabric tape. I was going to hide the hoops under a petticoat but when we tried it on we really liked the effect of the way it showed and made the skirt jump around.
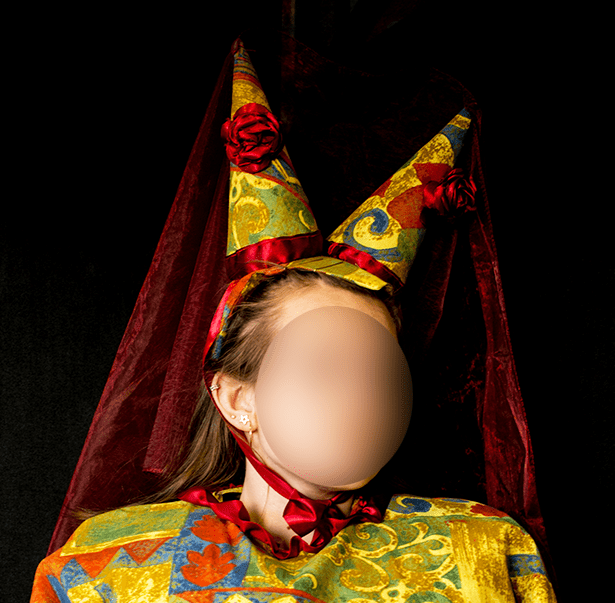
The headdress design was taken from the original Tenniel picture from the book. It had to be a double cone and again I had to create it from scratch with whatever I had at home – which was left-over wire and acrylic document wallets. I made and covered the frame to fit on the head and then made the cones and stitched them onto the frame. The burgundy fabric (a sheer curtain from the store) finished the look. It was hard to hold onto her head so I added combs under the frame, used a few hairgrips and tied it under the chin with a ribbon.
And Just One More….
Our ‘Alice’ was a very tall girl… when the purchased costume turned up it looked perfectly ‘Alicey’, but it really was quite short, and compared to Mary (and the look of the rest of the costumes) it really didn’t look like the ‘lead costume’. So with less than a week to go…
I struggled to find any plain cotton fabric in the right blue … too dark, too turquoise… so as I only had a few days I bought blue polyester satin…. another great fabric choice – not! It’s so slippy to sew and keeps moving about! I used the same style as the ‘Mary’ dress and Alice was starting to come together. Of course, I then realised we needed an apron, petticoat and bloomers! A white sheet and some broiderie anglaise trim was quickly added and we finally had our costume. On the dress rehearsal day I brought it in a bag and Alice was watching Mary put on her dress and said sadly, ‘my costume is fine but it doesn’t look as nice as this one’ – at which point I opened the bag… that made all the hard work worth while!! I even made her a handkerchief with her initials ‘AL’ embroidered in blue…


Honesty moment – your eyes will probably be drawn to the very uneven hem. It looked fine before I put it onto Alice but once it was being worn it was very uneven..and of course I didn’t have any time to re-do it, so I was totally cringing through all the performances. Of course, no-one else noticed it at all!
The Performances
I was very surprised when people said ‘I don’t know how you could do all that?’ ‘I wouldn’t know where to start’. All my life I’ve probably taken for granted that I can sew and didn’t really think about how other people might not be able to! In this new world of challenging fast fashion and thinking more about mending and re-using/re-modelling clothes and furnishings, I’d love to be able to share my knowledge with others.
Here are a few photos of the actual performances – they were amazing, colourful and I was so happy to be part of it. Final learning point since I started writing this – I need to take a lot more photos of my work!


Thanks for sticking with the long blog and I hope you enjoyed the costuming story of Alice!
